Recently, I was going through my android phone backups and found a game that I hadn’t played in a while. I reinstalled it with adb to play it again, but I realized that my In-App Purchase for the game could not be recovered as it was no longer on the Play Store and was no longer maintained. The In-App purchase was required as the game without it was a demo: The full version was unlocked via In-App Purchase. Eager to try to play the game again, I set out to look into what I would need to do to reverse engineer and unlock the full game.
As this is not my first time messing with this kind of challenge, I had an idea of how to approach the challenge. My basic plan was as follows:
- Decompile the apk file to look at the source code.
- Determine if the unlocking logic is straightforward.
- Modify the apk if needed.
- Install the modified apk.
Decompiling the APK
To decompile the APK file, I used JADX. I was amazed that it was able to decompile the apk file with all classes, variable names and others intact. This specific game was built using Cocos2D, so it looks like it couldn’t decompile any of the main game logic, but fortunately, it was not a problem.
Looking at the code for the main entry point class AppActivity , I was able to find what looks to be logic to check if the game can run as the full version. Specific variable names have been renamed for the game’s privacy:
...
SharedPreferences sp = PreferenceManager.getDefaultSharedPreferences(this);

String data = sp.getString(APP_5, APP_6);
if (data.equals(APP_11)) {
  isFullVersion = true;
}
...
later in the app’s lifecycle, we find the following code:
...
int aaa = appc.ItemStore.getItemCount("buy_game");
if (aaa == 1) {
SharedPreferences sp = PreferenceManager.getDefaultSharedPreferences(_instance);
SharedPreferences.Editor editor = sp.edit();
String data_2 = sp.getString(APP_5, APP_6);
if (!data_2.equals(APP_11)) {
  editor.putString(APP_5, APP_11);
  editor.commit();
}
...
appc here looks to be a class for handling IAP. So it looks like in this code, it checks to see if the “buy_game” IAP was purchased, and if so, sets the SharedPreferences property APP_5 to APP_11 . The values of APP_5 and APP_11 were defined at the beginning of the class.
These are not the actual values, but for now we will define them as: APP_5 = "is_fullversion" and APP_11 = "true".
Shared Preferences is a file saved on your device with each app that stores things like settings, user configurations, etc. In the context of games, it is often where save data is also stored.
So to unlock the full version of the game, all we need to do is modify the Shared Preference file on our device for the app, set the property "is_fullversion" to "true". Easy right? well…
Getting to the Shared Preferences file
The Shared Preferences file on your device will be at /data/data/[app package name]/shared_prefs/ there may be multiple Shared Preference files, so we may have to find the correct one. Unfortunately, this directory on your device is not usually accessible as you do not have permission to view app package data. There are two options.
One is to Root your device. With a rooted device, it is easily accessible as root, making things very easy. In my case, I had no interest in rooting my device.
An app’s data directory is accessible if the app is set as debuggable. So this is the option I went with.
The next step was to make the app debuggable so that we can debug it on our device and get to the shared_prefs folder. To do this, we need to do a few things:
Disassemble the APK using Apktool
Apktool is a command-line tool for disassembling APKs. By disassembling the APK, we can modify the contents of the APK. After making changes, we will later reassemble it to an APK. We can disassemble the APK with the following command:
apktool d target.apk
Modifying AndroidManifest.xml to make the app debuggable
Once disassembled, we will edit AndroidManifest.xml. In the file, we will find the <application> tag and add the android:debuggable="true" attribute to it to make the app debuggable. Once modified, it should look something like this:
<application ... android:debuggable="true">That’s all the changes we need to make.
Reassembling the APK
To reassemble the apk, we just run Apktool again:
apktool b target/ -o target.modified.apkAlmost there. Unfortunately, this isn’t enough to be able to install the modified app. All apps that should be installed on a real device need to be signed. There are many tools to sign an app, but in my case, I used Uber Apk Signer. The example is specific to this, but other tools should be similar:
java -jar uber-apk-signer.jar --apks target.modified.apkThe above if successful, will output a new target.modified-aligned-debugSigned.apk file. This is the file we want to install on our device.
Installing our modified apk
Installation can be done using your favorite method. In my case, I just use abd as it is the simplest. Before doing this step Make sure the app is not installed on the device. Uninstall it if it is still installed. The command to install using adb is the following:
adb install [apk file]If successful, you should be prompted on your device to complete installation. We’re almost done!
Setting the app to be debugged
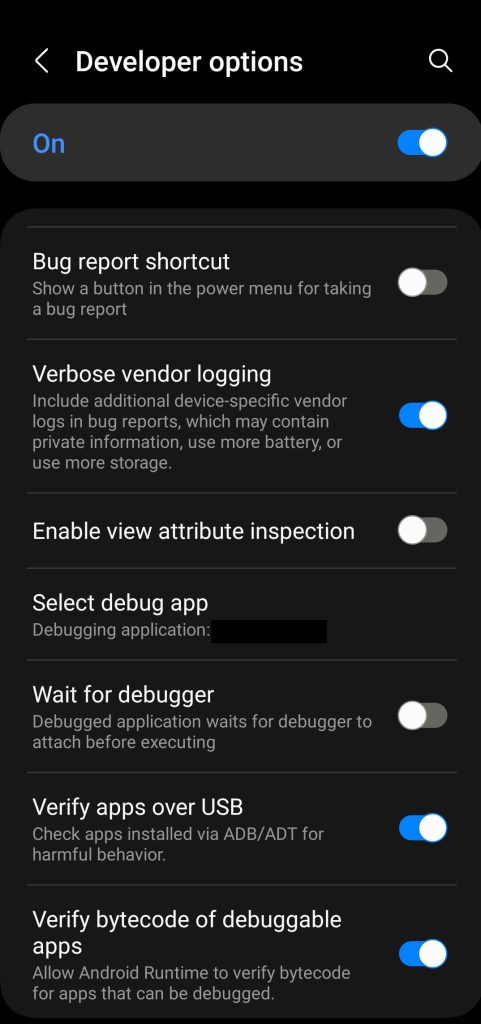
Once installed, we want to set the app as our Debug App on the device. Go to Developer Options > Select Debug App (If you don’t have Developer Options enabled, you will need to do that first), and in the list, our modified app should show up. Select it. Once selected, we can finally visit the directory shown at the beginning of the article.

Finally Downloading and Modifying the Shared Preference File
The easiest way to modify the shared preference file is to use Android Studio‘s built-in Device Explorer. Using it, you should be able to access the /data/data/[app package name]/shared_prefs/ folder. From here, we just download the file, modify it, and re-upload it! We’re finally done!
All in all, this was a great exercise for me. I learned a lot and it was a bit eye-opening to see how good the tools available today are in regard to reverse engineering in the Android space.
